OAuth with GitHub
In this tutorial, we’ll be setting up Auth.js in a Next.js application to be able to log in with GitHub.
This tutorial uses GitHub as the OAuth provider and Next.js as the framework. Note that for any OAuth provider or any framework, the process will be the same/very similar, mainly differing on how you register your application in the chosen provider’s dashboard.
Setting up Auth.js
Installing Auth.js and Next.js
For this tutorial, we’re gonna use the default Auth.js & Next.js example app. If you already have an existing Next.js app, it should work too. If you don’t, clone the repository:
git clone https://github.com/nextauthjs/next-auth-example.git && cd next-auth-exampleIf you’re using the example app, Auth.js is already installed, otherwise follow the installation instructions.
Creating the server config
Next, we’re gonna create the main Auth.js configuration file which contains the necessary configuration for Auth.js, as well as the dynamic route handler.
import NextAuth from "next-auth"
import GitHub from "next-auth/providers/github"

export const { handlers, auth } = NextAuth({
  providers: [GitHub],
})import { handlers } from "@/auth" // Referring to the auth.ts we just created
export const { GET, POST } = handlers
export const runtime = "edge" // optionalSince this is a catch-all dynamic route, it will respond to all the relevant Auth.js API routes so that your application can interact with the chosen OAuth provider using the OAuth 2 protocol.
Adding environment variables
If you haven’t, create an .env.local file as explained in the installation section and add the following two GitHub variables:
AUTH_SECRET="changeMe"

AUTH_GITHUB_ID=
AUTH_GITHUB_SECRET=
We will be filling AUTH_GITHUB_ID and AUTH_GITHUB_SECRET with proper values from the GitHub Developer Portal once we have registered our application in GitHub.
Registering your App
Creating an OAuth App in GitHub
To get the required credentials from GitHub, we need to create an application in their developer settings.
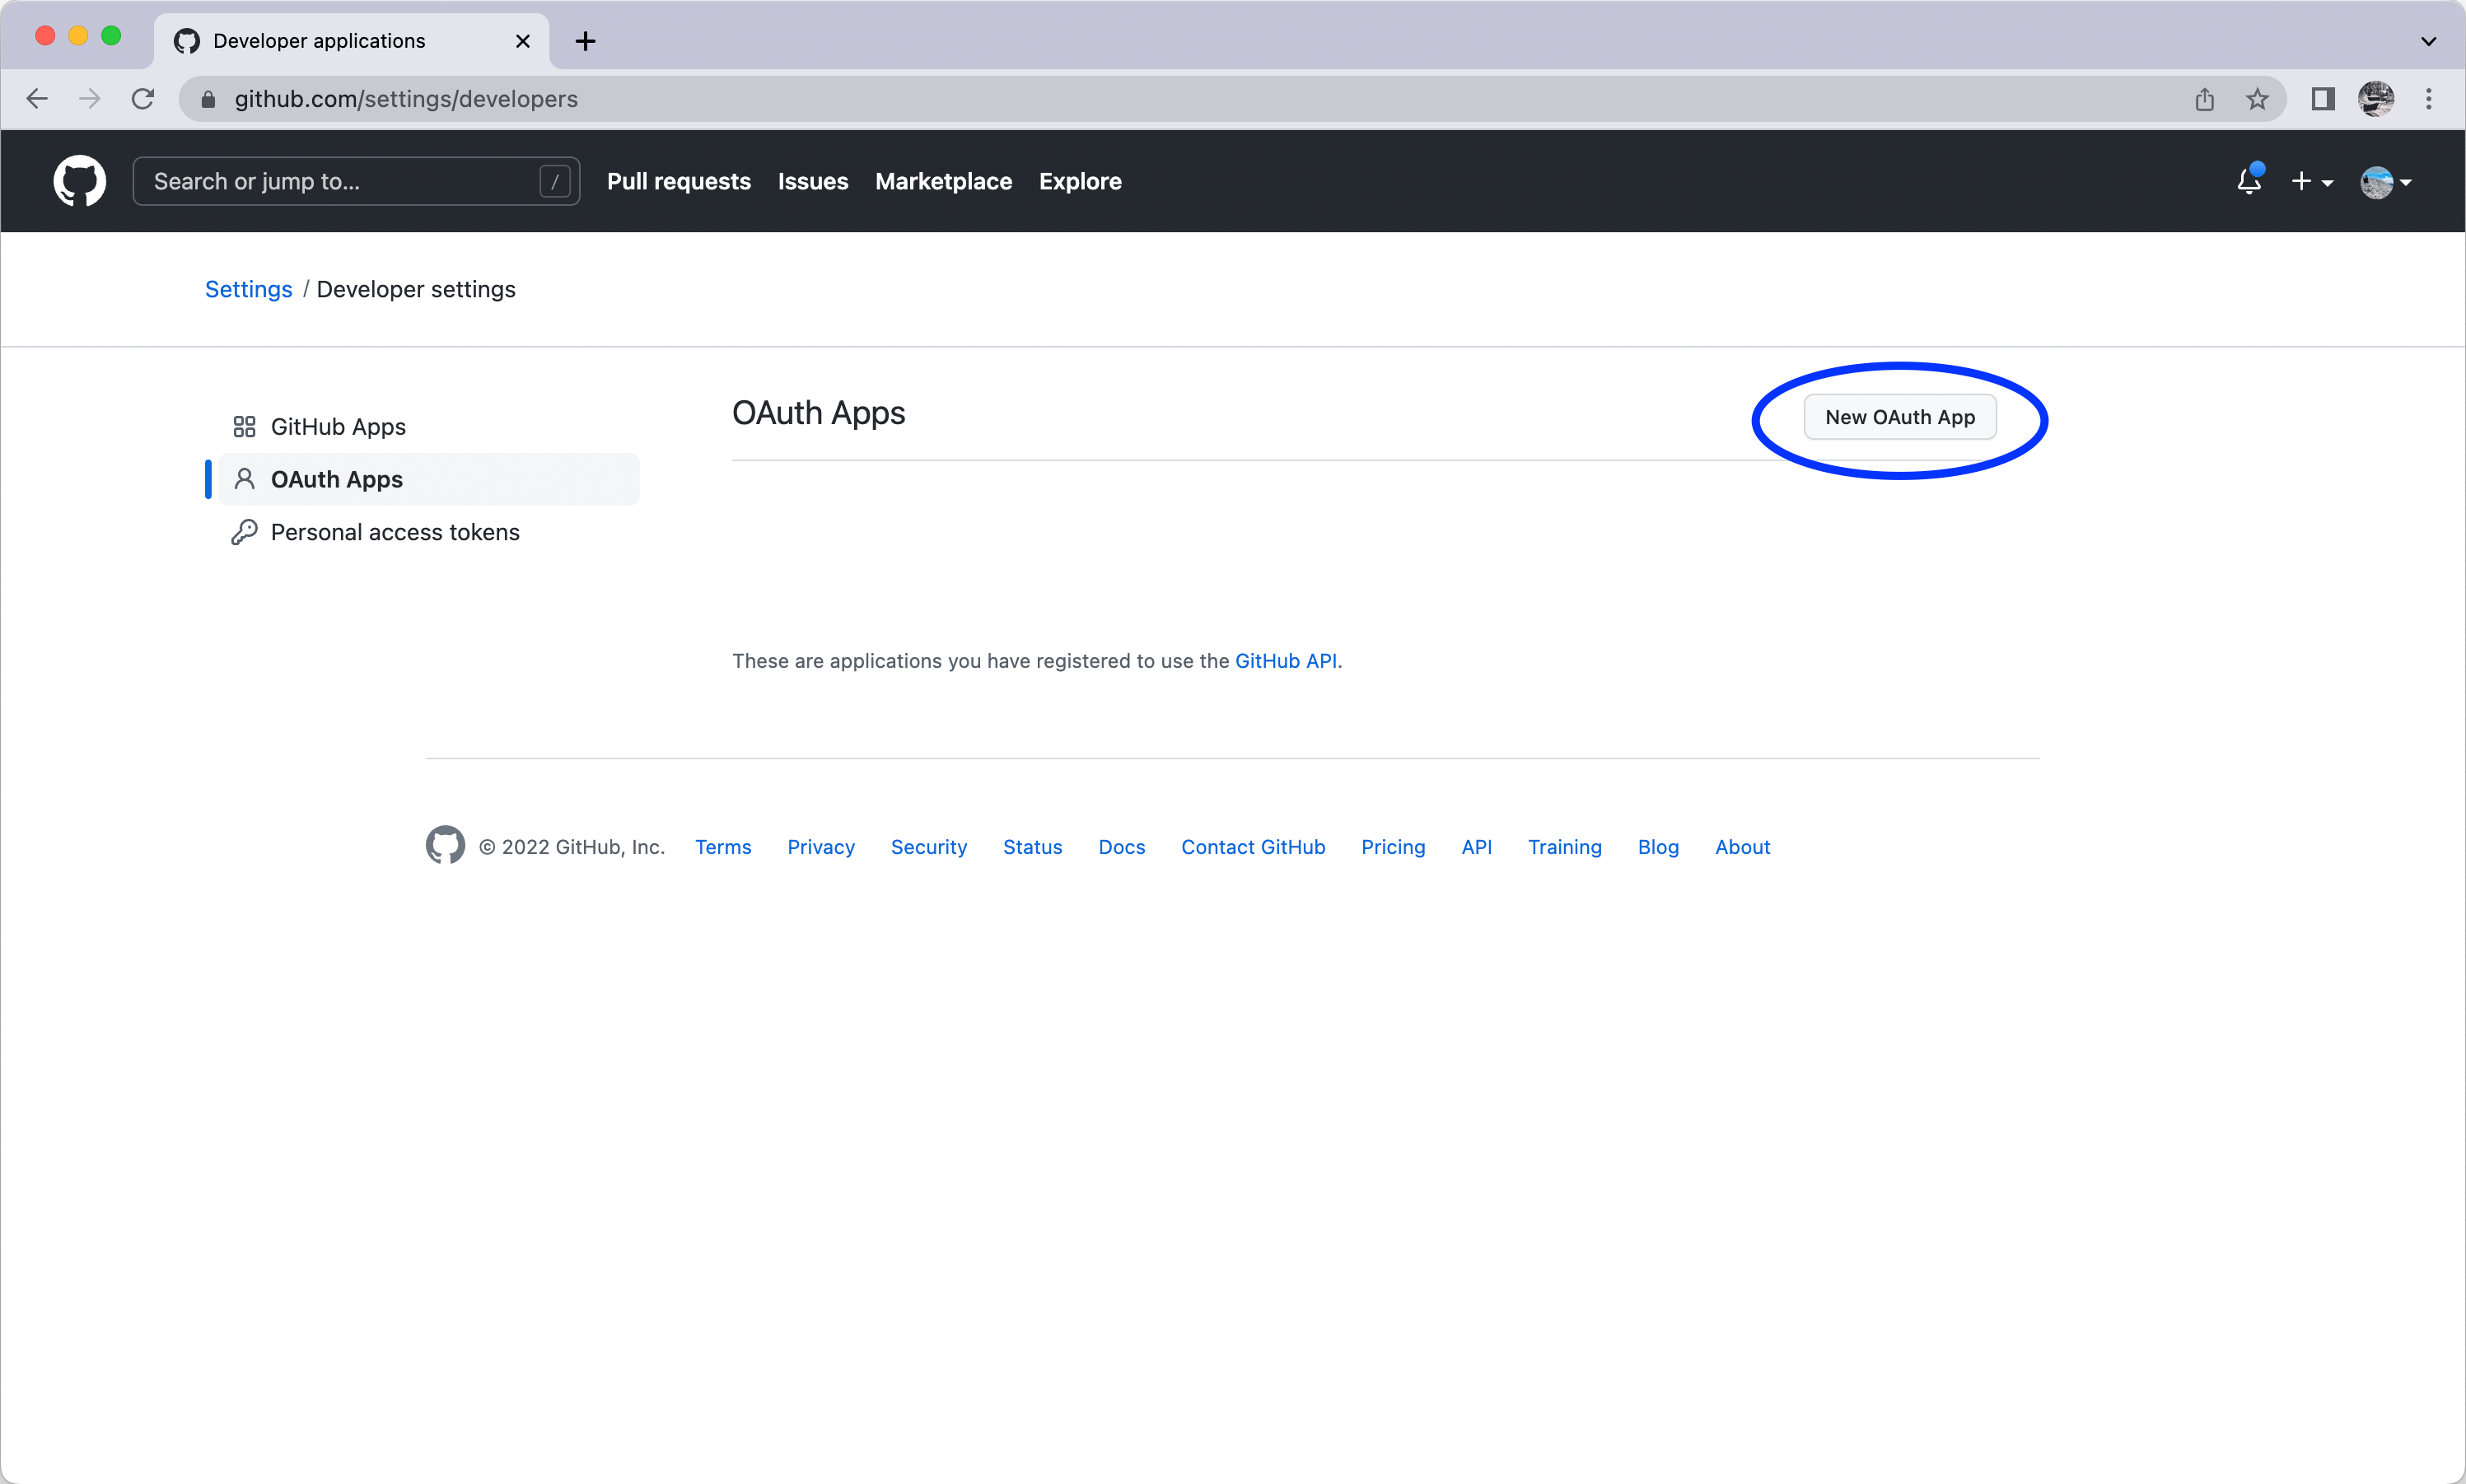
Go to the GitHub developer settings, also found under Settings → Developers → OAuth Apps, and click “New OAuth App”:
Next, you’ll be presented with a screen to register your application. Fill in all the required fields.
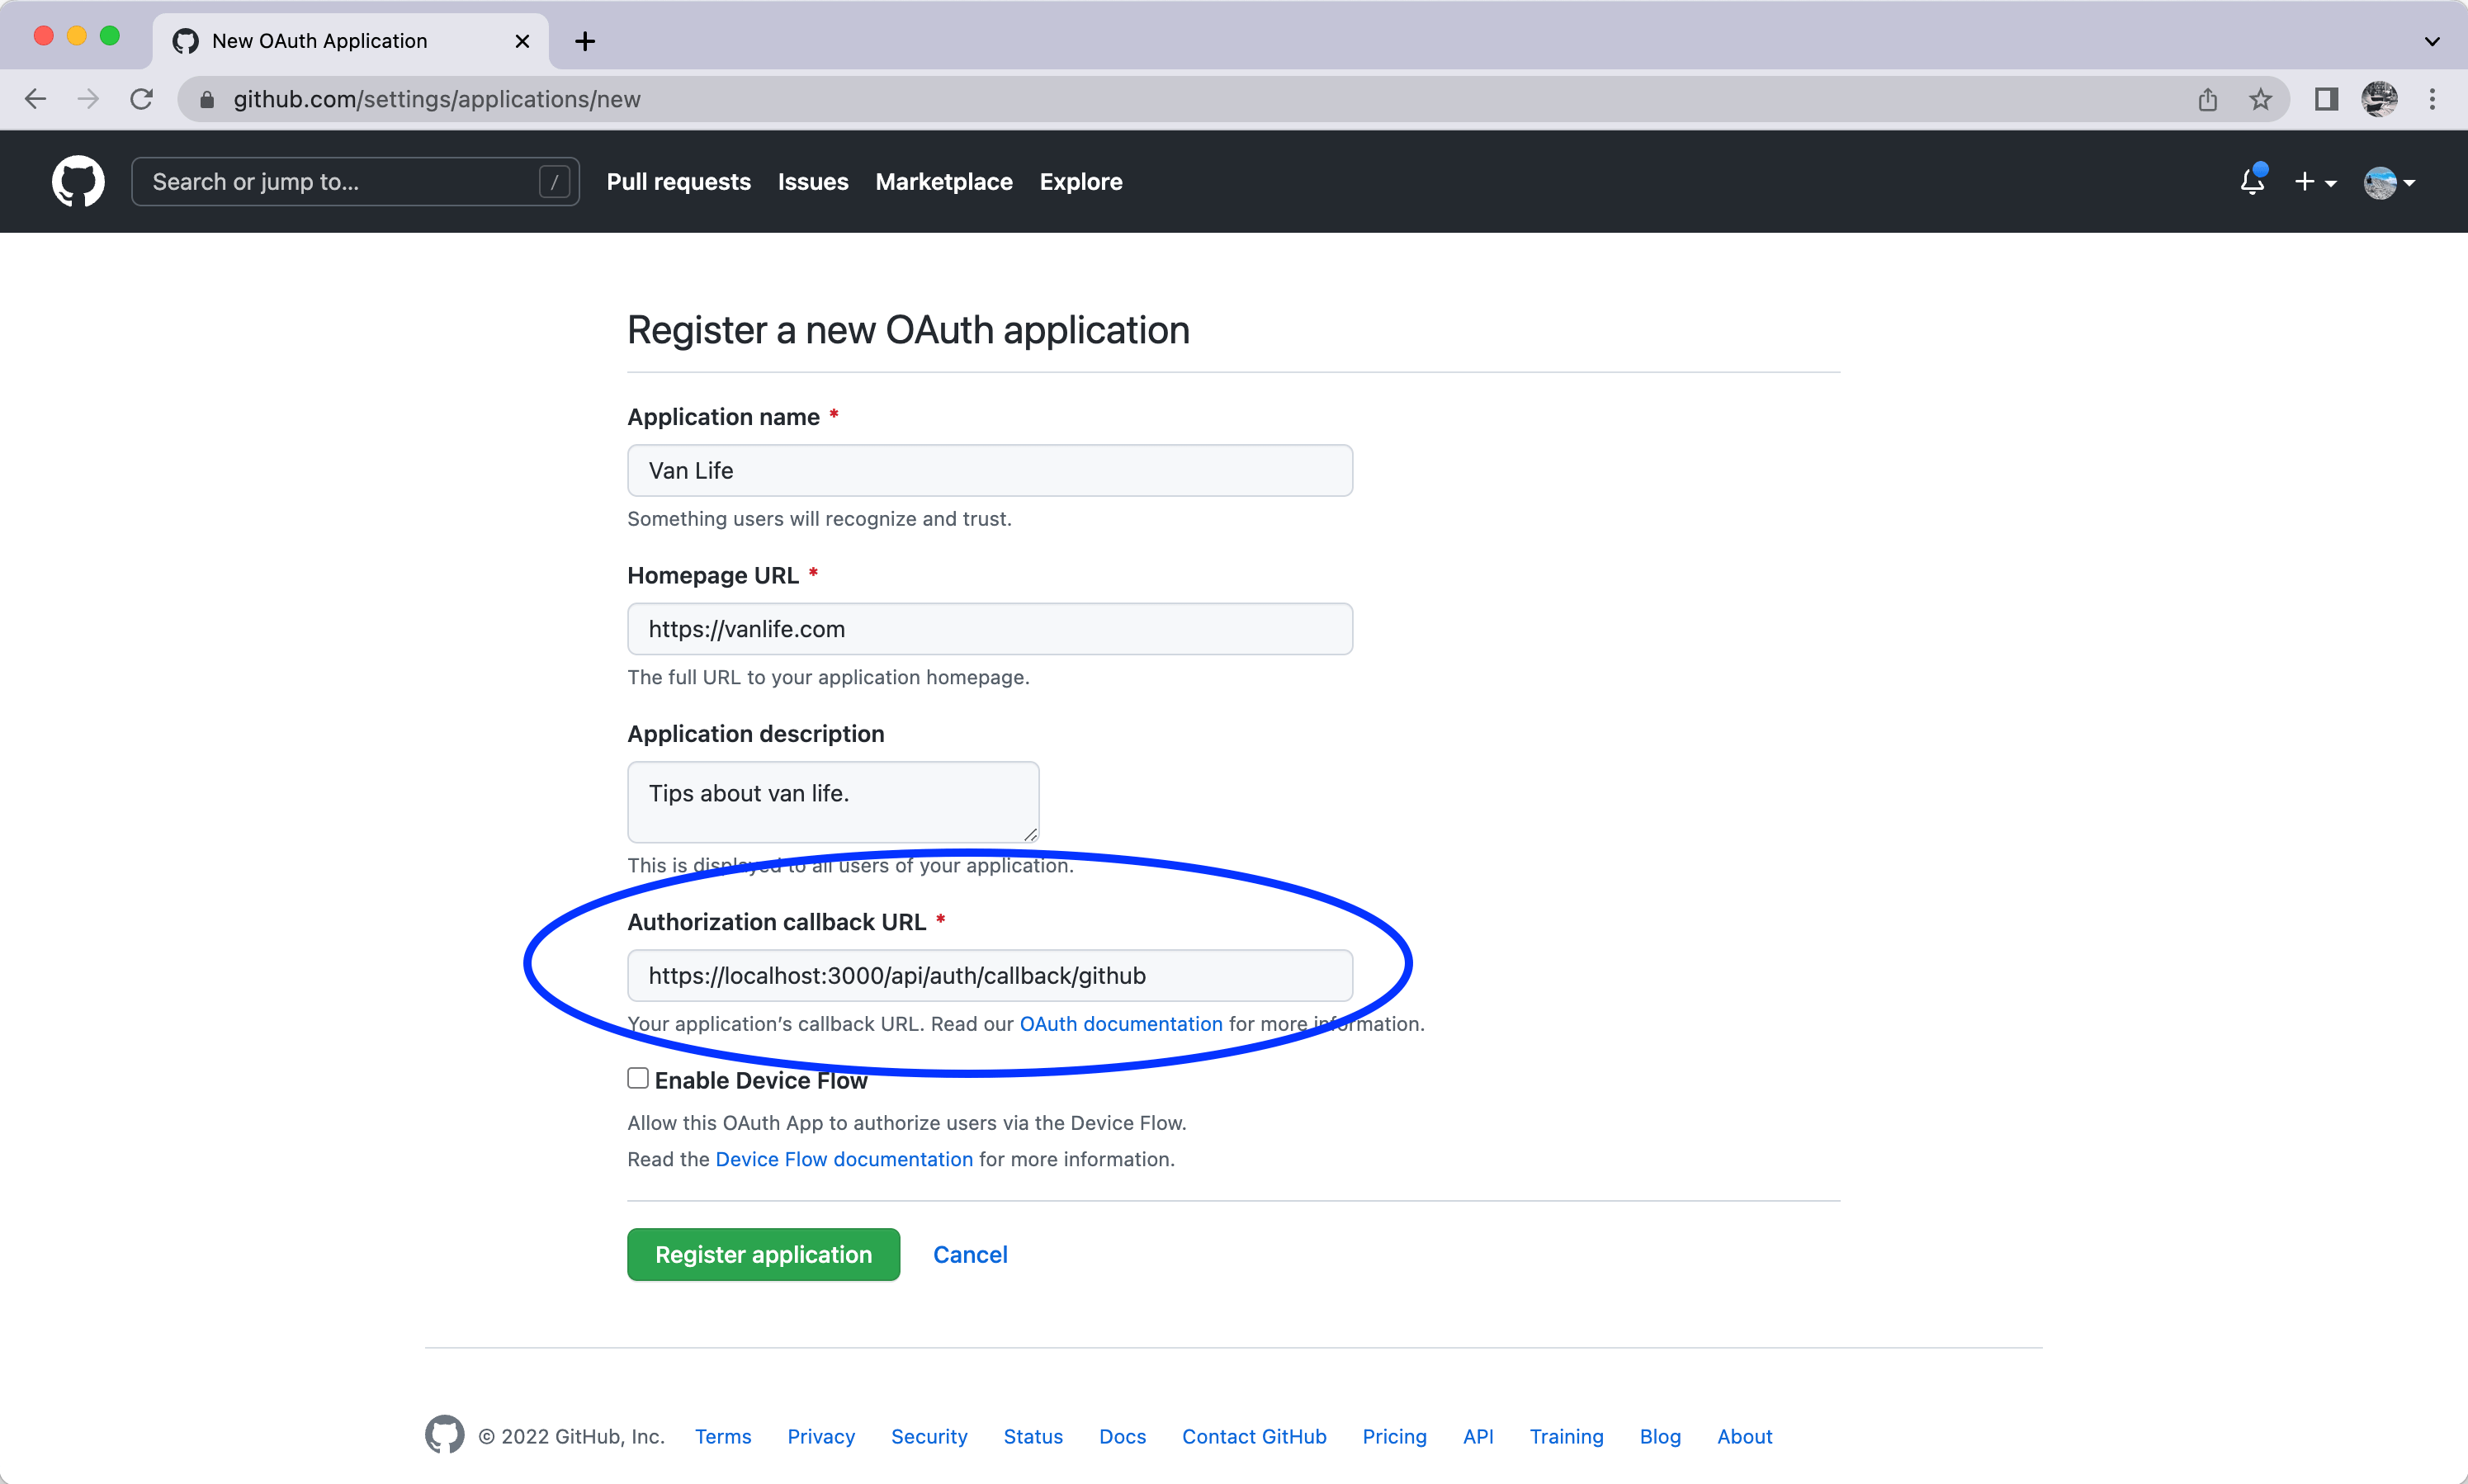
The default callback URL should generally take the form of [origin]/api/auth/callback/[provider], however, the default is slightly different depending on which framework you’re using.
// Local
http://localhost:3000/api/auth/callback/github

// Prod
https://app.company.com/api/auth/callback/githubOnce you’ve entered all the required fields, press “Register application”.
Secrets
After successfully registering your application, GitHub will present us with the required details.
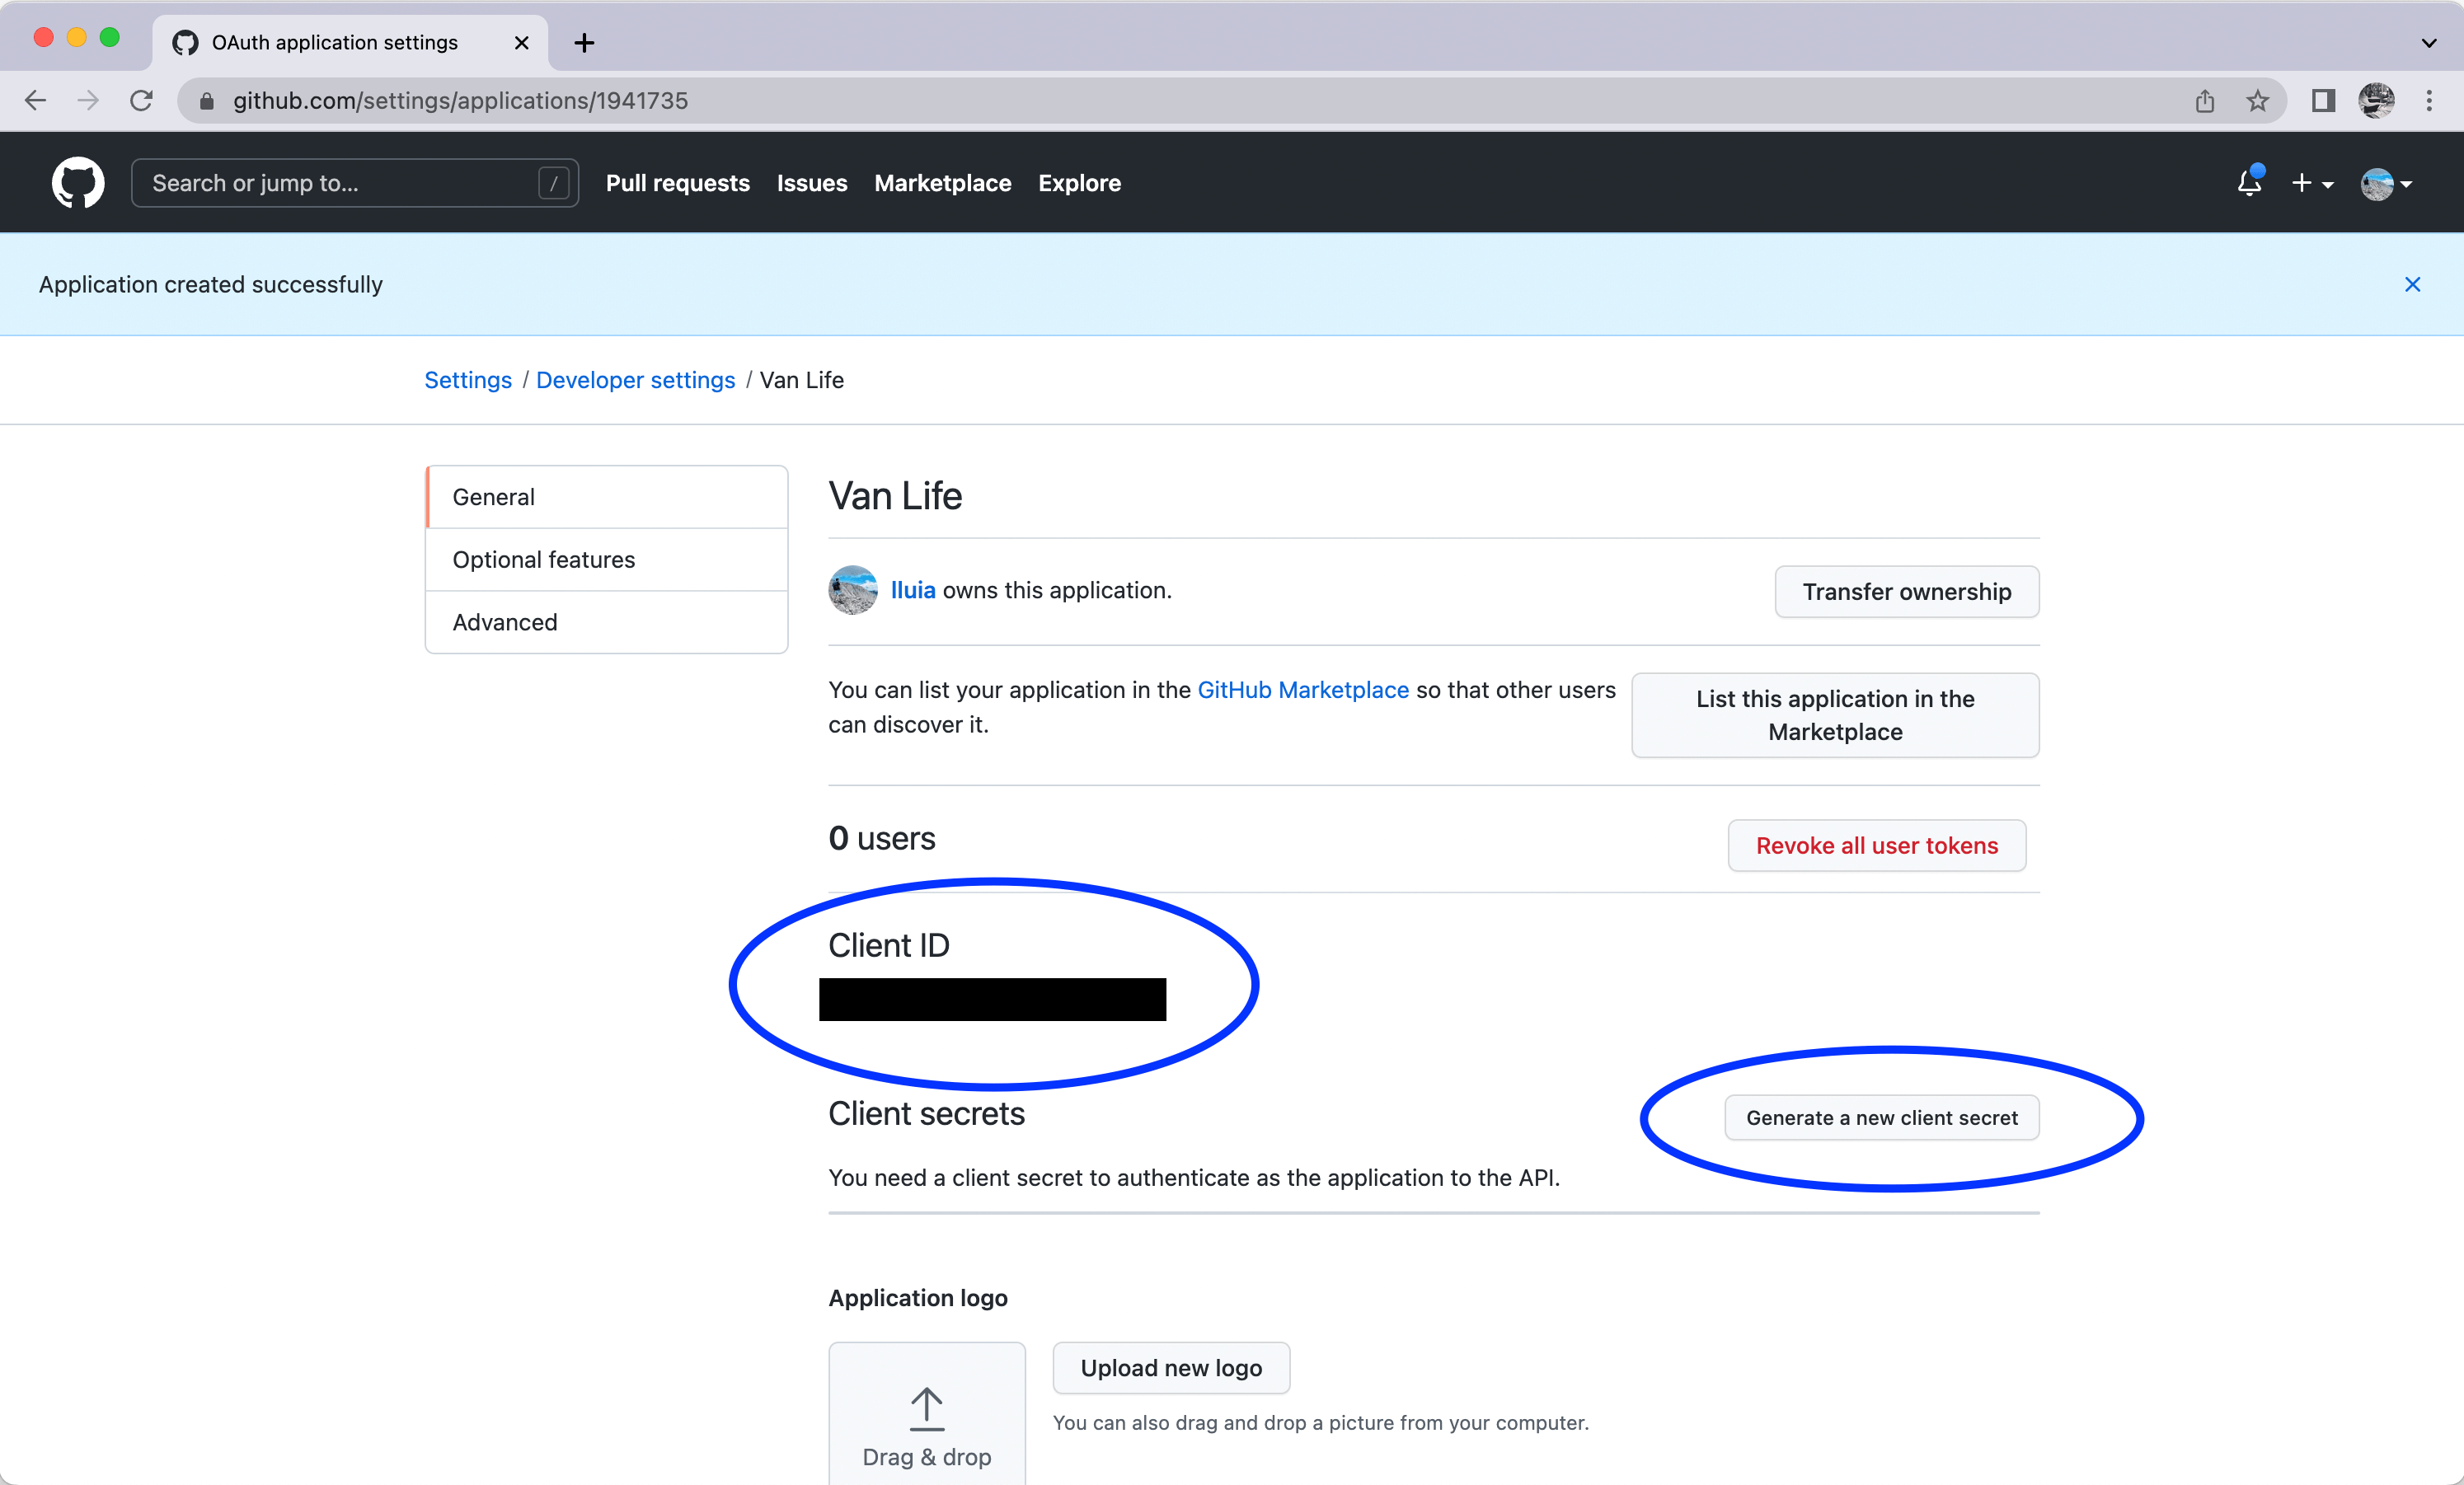
We need 2 things from this screen, the Client ID and Client Secret.
The Client ID is always visible, it is a public identifier of your OAuth application within GitHub.
To get a Client Secret, you have to click on “Generate a new client secret”, which will create your first client secret. You can easily create a new client secret here in case your first one gets leaked, lost, etc.
Keep your Client Secret secure and never expose it to the public or share it with people outside your organization.
Wiring all together
Now that we have the required Client ID and Client Secret, paste them into your .env.local file we created earlier.
AUTH_SECRET="changeMe"

AUTH_GITHUB_ID={clientId}
AUTH_GITHUB_SECRET={clientSecret}
With all the pieces in place, you can now start your local dev server and test the login process.
npm run devNavigate to http://localhost:3000. You should see the following page:
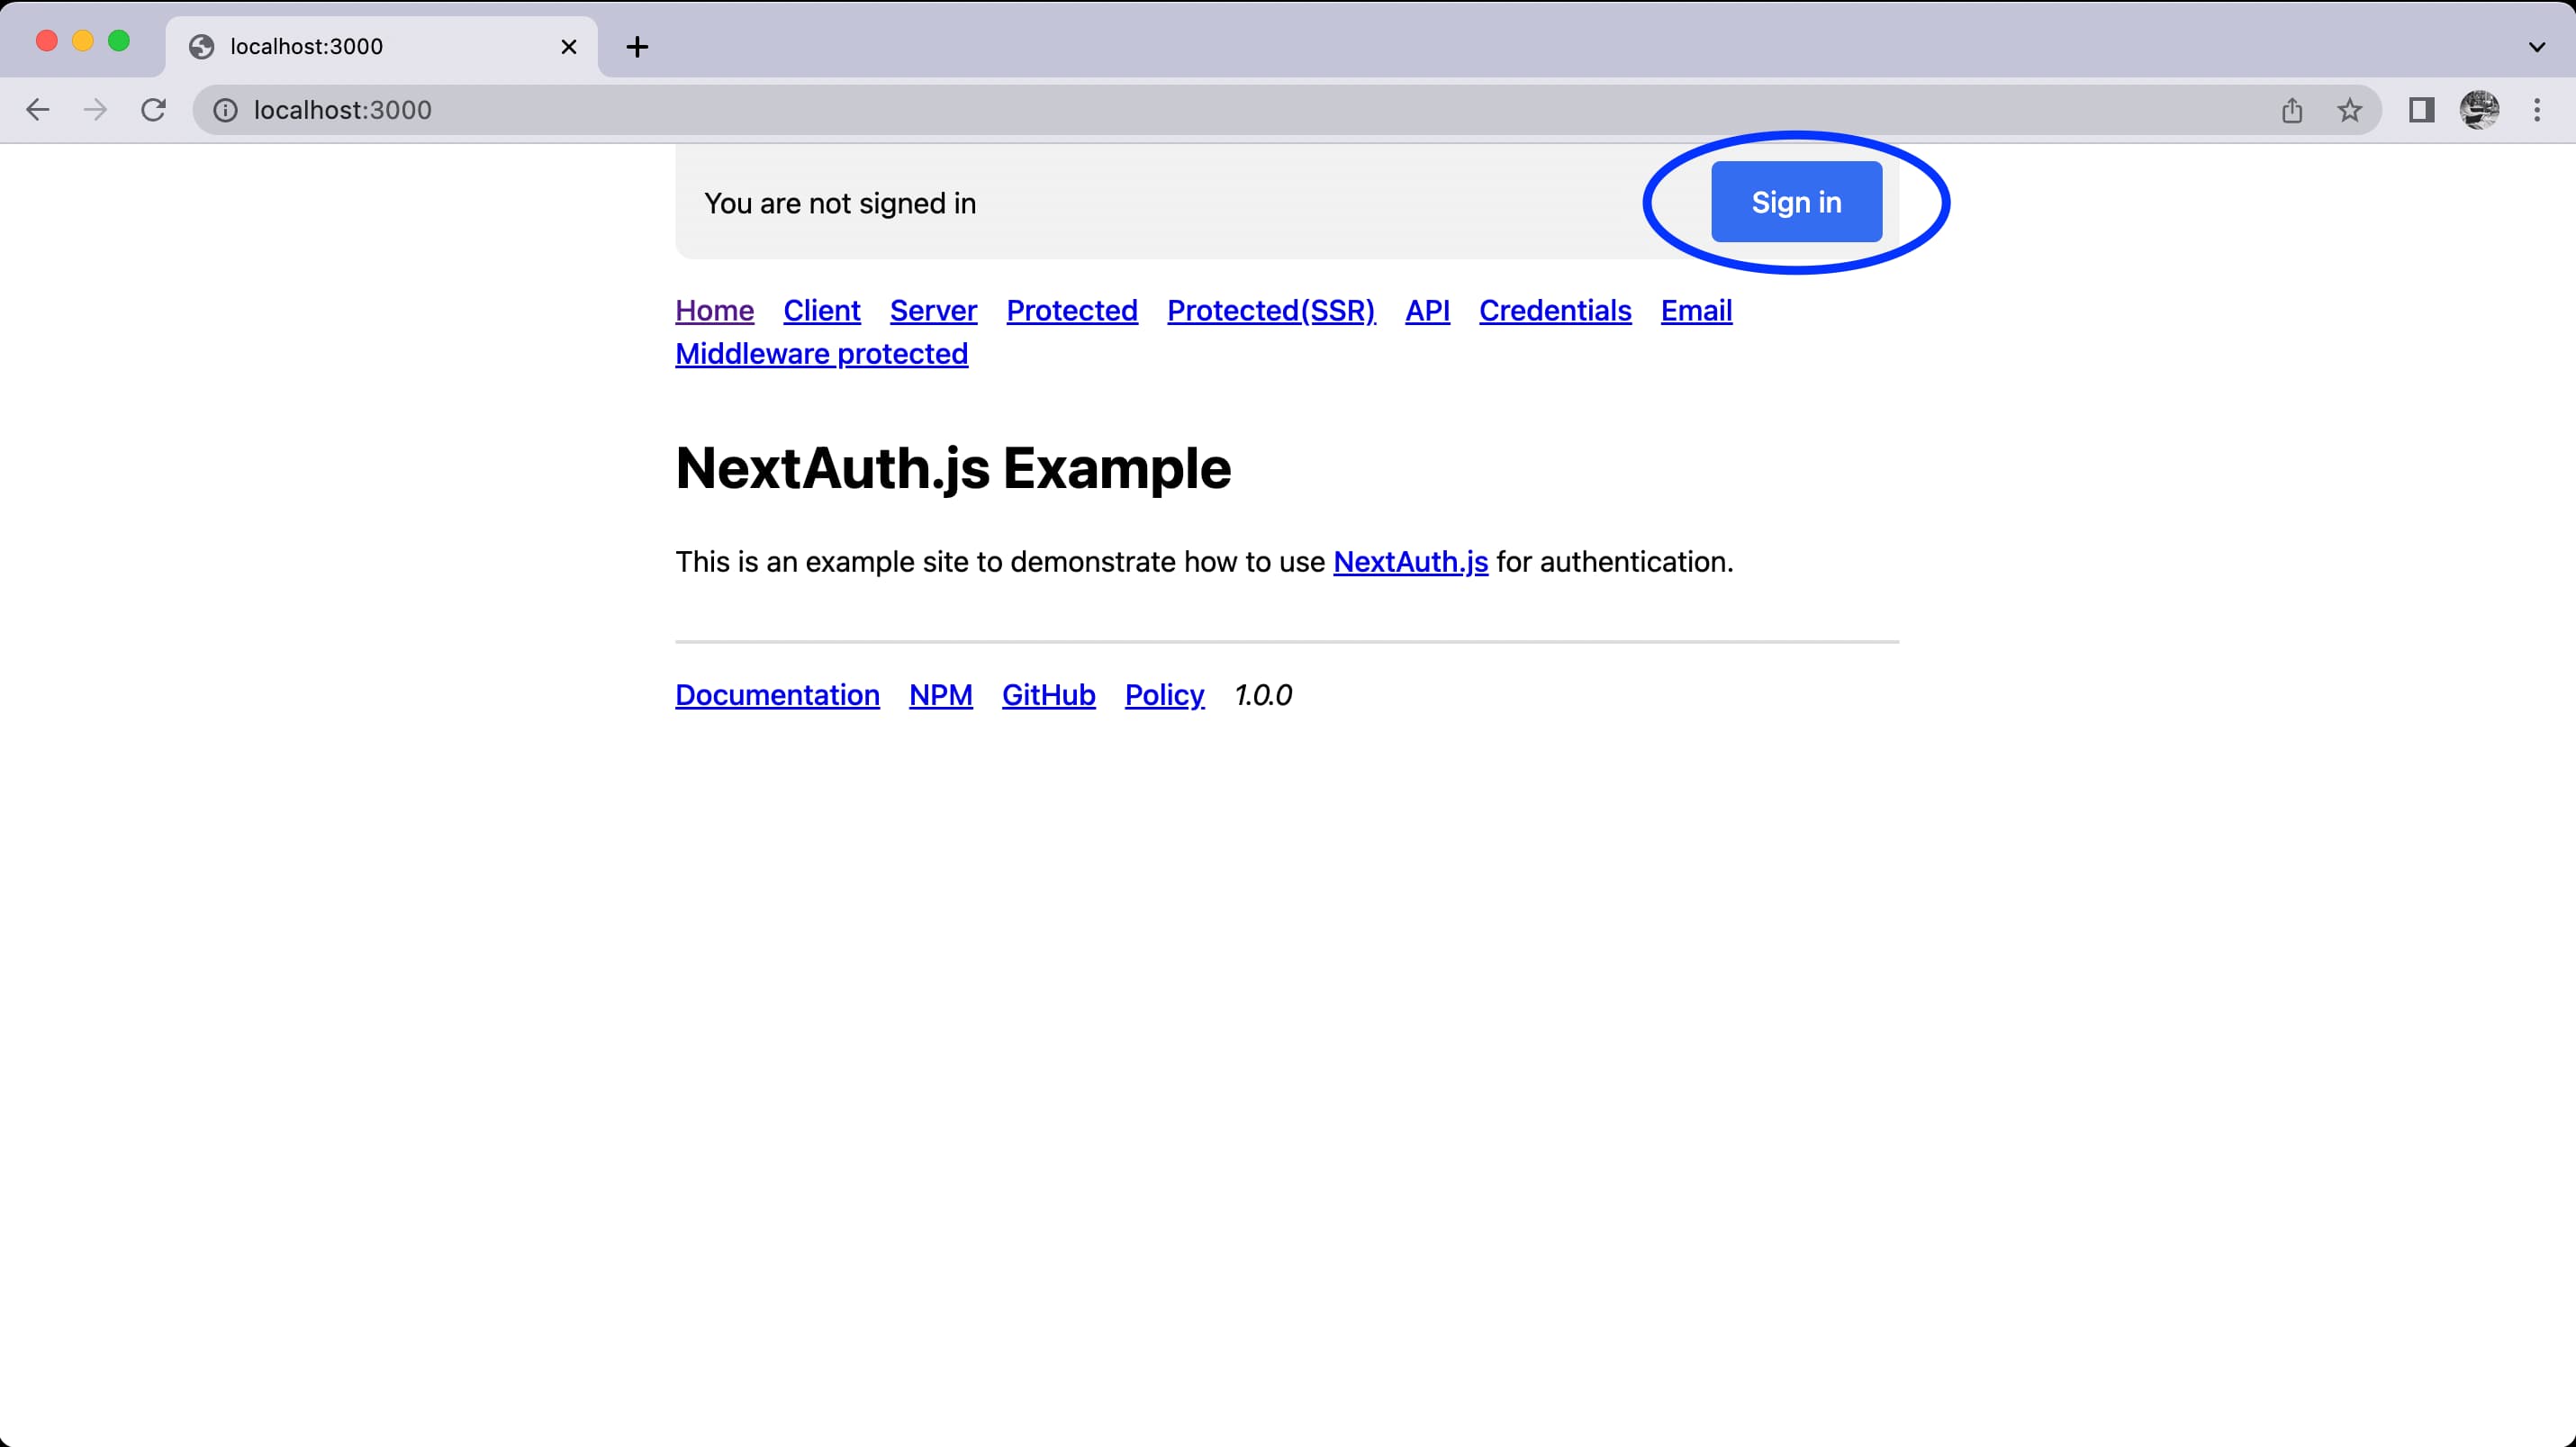
Click on “Sign in”, you should be redirected to the default Auth.js signin page. You can customize this page to fit your needs. Next, click on “Sign in with GitHub”. Auth.js will redirect you to GitHub, where GitHub will recognize your application and ask the user to confirm they want to authenticate to your new application by entering their credentials.
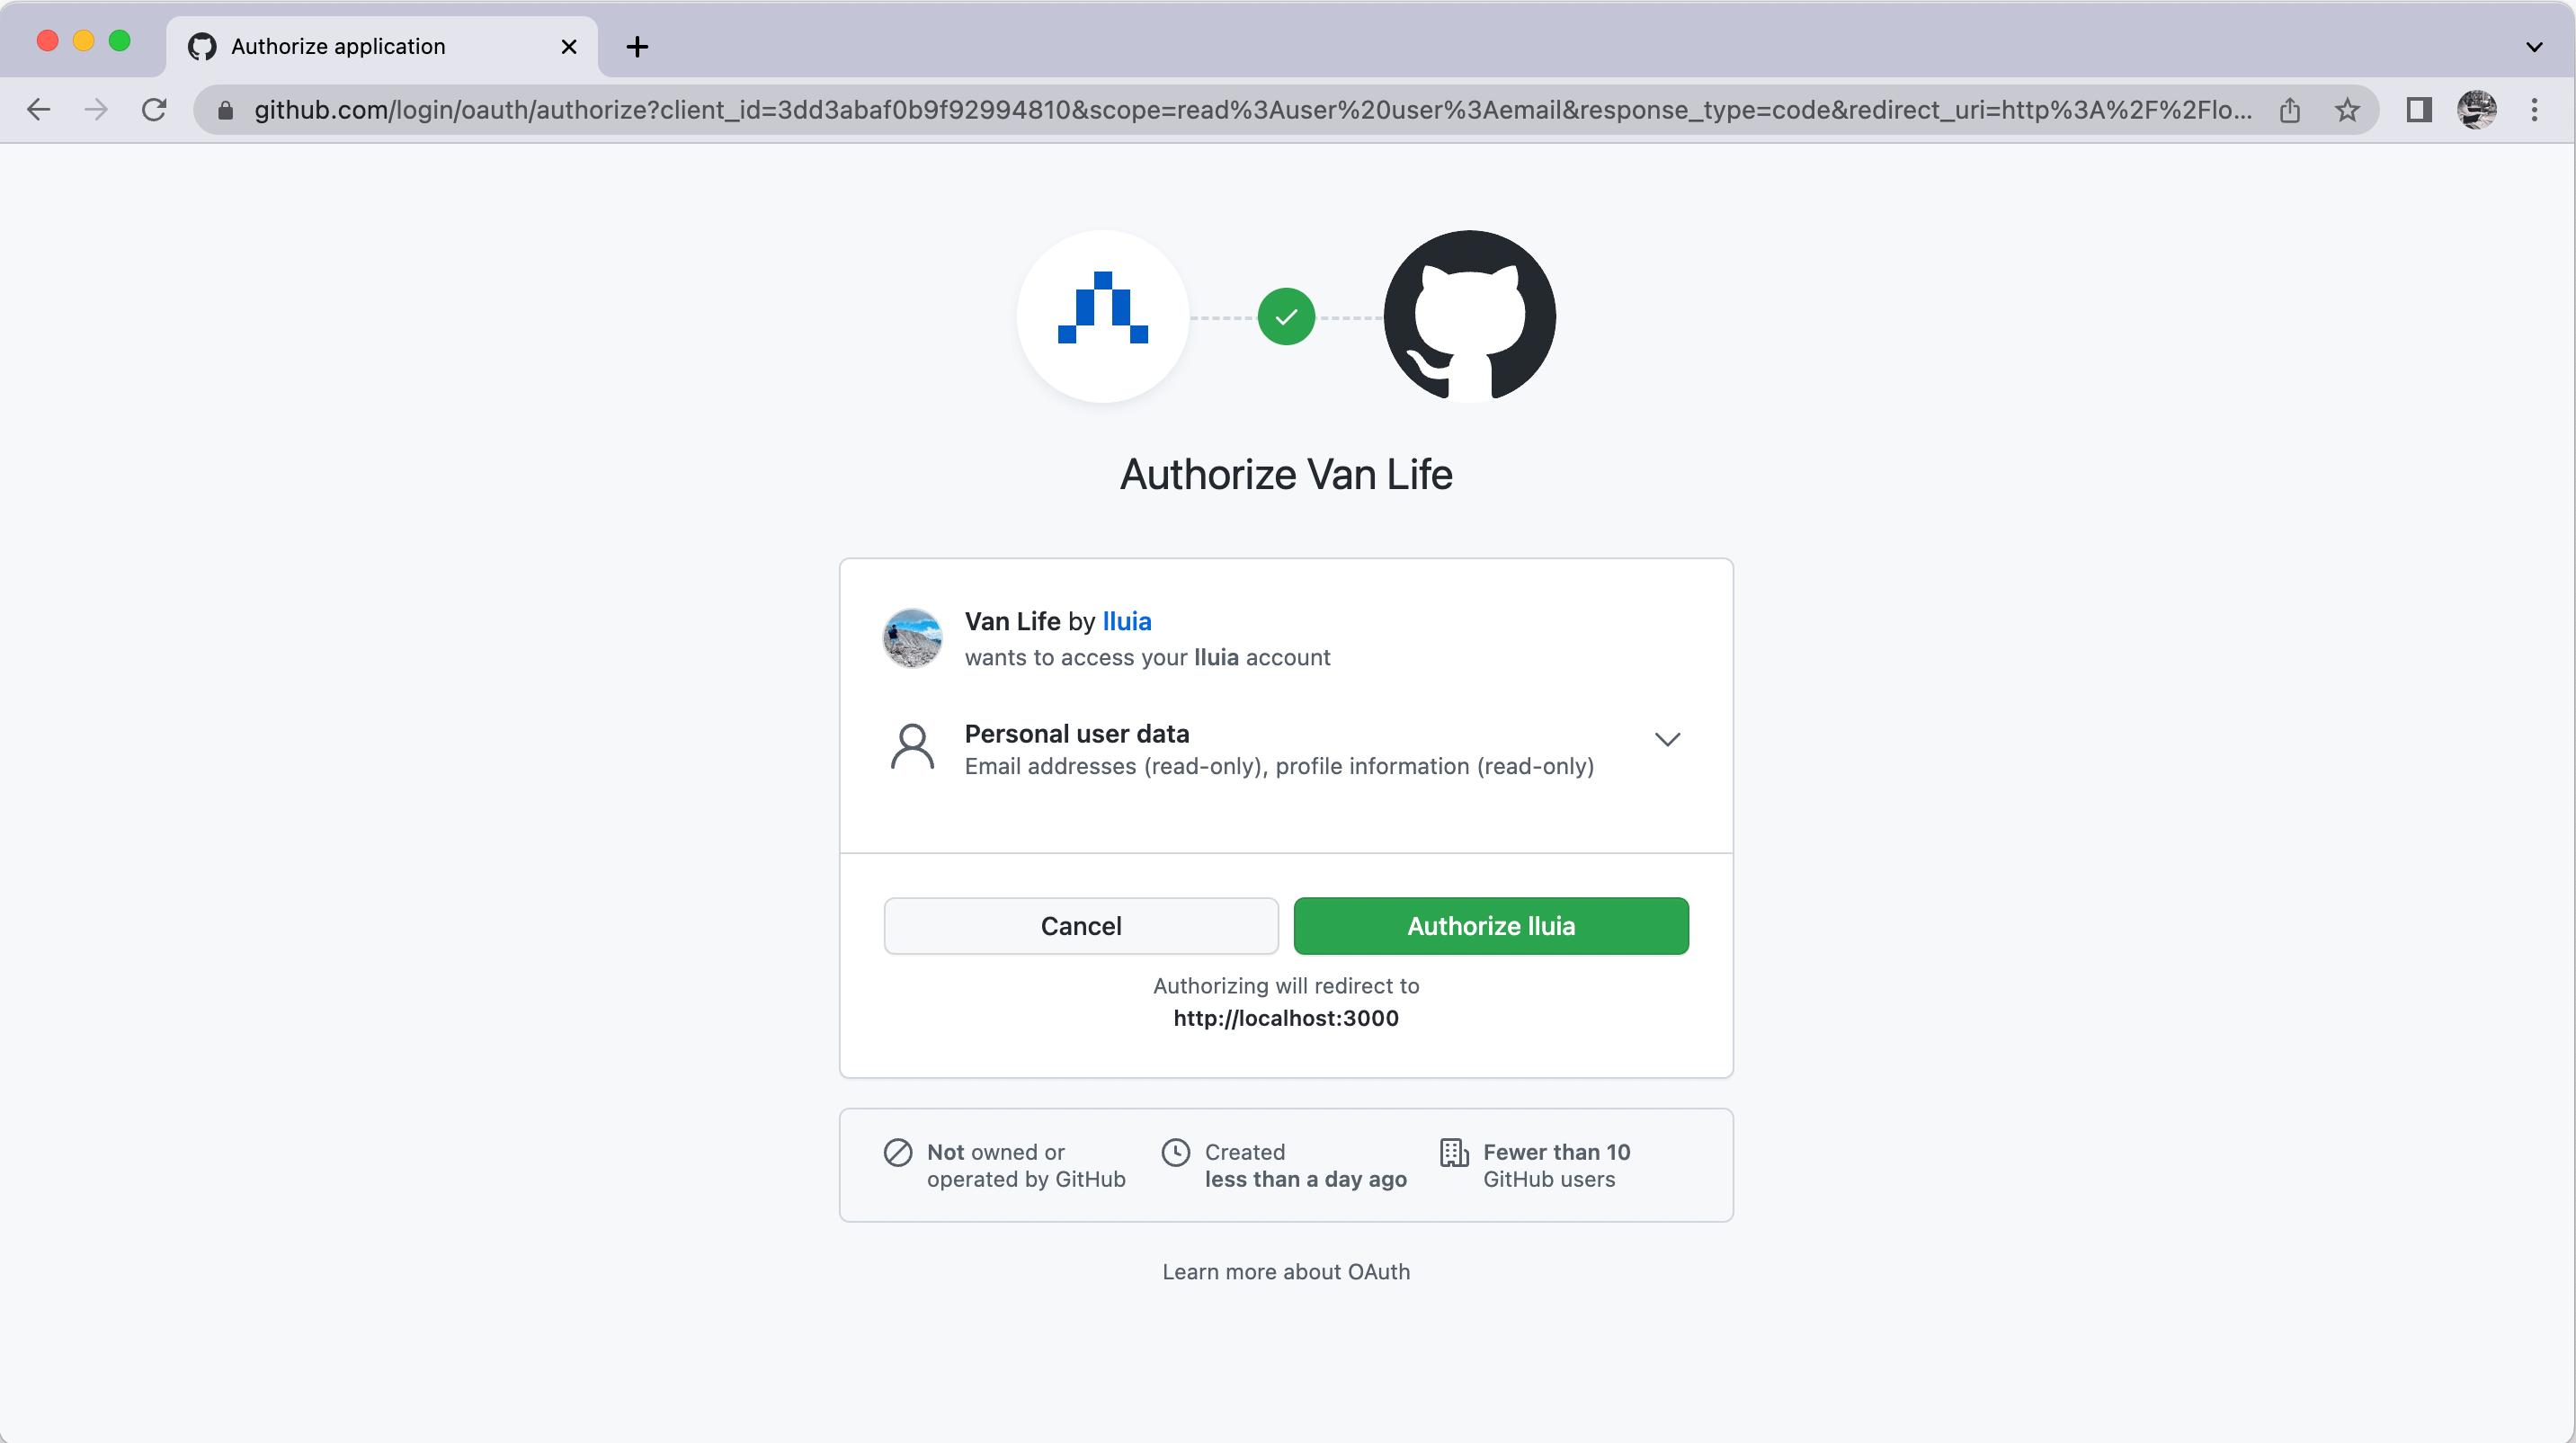
Once authenticated, GitHub will redirect the user back to your app and Auth.js will take care of the rest:

If you’ve landed back here that means everything worked! We have completed the whole OAuth authentication flow so that users can log in to your application via GitHub!
As you can see, most of the time required setting up OAuth in your application is spent registering your application in the OAuth provider’s dashboard (some are easier to navigate, some are harder). Once registered, the setup via Auth.js should be straight forward.
Deployment
Before you can release your app to production, you’ll need to change a few things.
Unfortunately, GitHub is among the providers which do not let you register multiple callback URLs for one application. Therefore, you’ll need to register a separate application in GitHub’s dashboard as we did previously but set the callback URL to your application’s production domain (.i.e https://example.com/api/auth/callback/github). You’ll then also have a new Client ID and Client Secret that you need to add to your production environment via your hosting provider’s dashboard (Vercel, Netlify, Cloudflare, etc.) or however you manage environment variables in production.
Refer to the Deployment page for more information.